In this article you will see how to transfer data using various protocols with cURL, using the PHP library, libcurl. I will show you, in this article, only some of the most important protocols, like: FTP, FTPS, FILE, HTTP, HTTPS, SMTP, SMTPS.
As I wrote in my PHP multithreading with cURL article, the libcurl is a free and easy-to-use client-side URL transfer library, supporting DICT, FILE, FTP, FTPS, GOPHER, HTTP, HTTPS, IMAP, IMAPS, LDAP, LDAPS, POP3, POP3S, RTMP, RTSP, SCP, SFTP, SMTP, SMTPS, TELNET and TFTP. PHP supports the libcurl library which allows you to connect and communicate to many different types of servers with many different types of protocols. Libcurl currently supports the HTTP, HTTPS, FTP, GOPHER, TELNET, DICT, FILE and LDAP protocols. Libcurl also supports HTTPS certificates, HTTP POST, HTTP PUT, FTP uploading (this can also be done with PHP’s ftp extension), HTTP form-based upload, proxies, cookies and user+password authentication. These library functions have been added to PHP 4.0.2. To use this library in PHP, remove the “;” from extension=php_curl.dll in php.ini, put ssleay32.dll and libeay32.dll in Windows/System32, and copy the php_curl.dll into Windows/System32.
PHP Data Transfer via FTP with Libcurl
File Transfer Protocol (FTP) is a standard network protocol used to transfer files from one host to another over a TCP-based network, such as the Internet. FTP is built on a client-server architecture and utilizes separate control and data connections between the client and server. FTP users may authenticate themselves using a clear-text sign-in protocol but can connect anonymously if the server is configured to allow it.
In this section, to show how to transfer data using the FTP protocol with cURL, I created an online public FTP account. After creating this account, I got the following login information:
FTP address  - ftp9.Jabry.com
Username - florinsteaua
Password - florinsteaua
Note that I gave you the password to test yourself on this account, if you want, and to use whatever you file you want, from your computer.
And then, to see the result of my cURL-FTP client, I installed the FileZilla client. In the File-> Site Manager menu option, I set the corresponding options for my public FTP account from above, as you can see in the below picture:
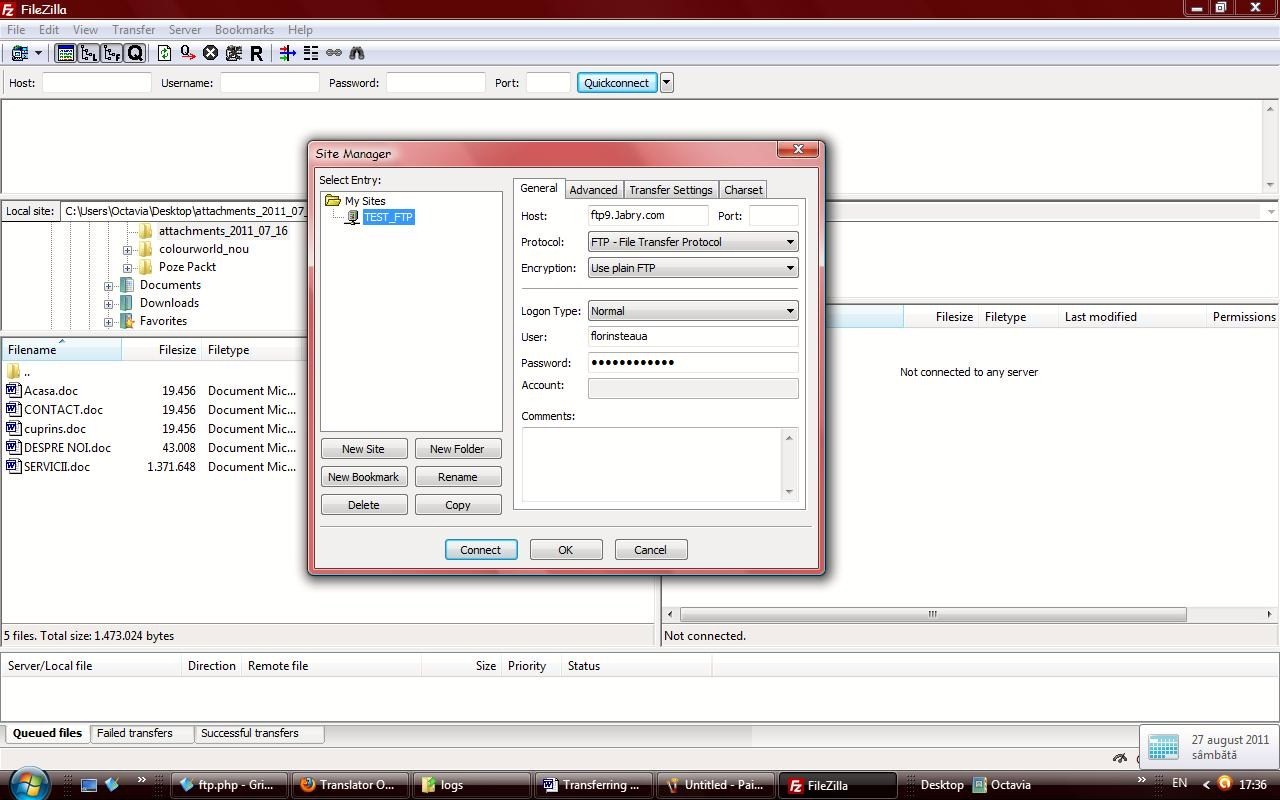
Click here for larger image
Figure 1. Setting the FileZilla Site Manager by providing the corresponding information
Then, press Connect button. You should get something like this:
Status:	Resolving address of ftp9.Jabry.com
Status:	Connecting to 67.208.91.118:21...
Status:	Connection established, waiting for welcome message...
Response:	220 users9 V2 WS_FTP Server 5.0.4 (0)
Command:	USER florinsteaua
Response:	331 Password required
Command:	PASS ************
Response:	230 user logged in
Command:	SYST
Response:	215 UNIX
Command:	FEAT
Response:	500 illegal command
Status:	Connected
Status:	Retrieving directory listing...
Command:	PWD
Response:	257 "/florinsteaua" is current directory
Command:	TYPE I
Response:	200 Type set to IMAGE.
Command:	PASV
Response:	227 Entering Passive Mode (67,208,91,118,14,129).
Command:	LIST
Response:	150 Opening ASCII data connection for directory listing
Response:	226 transfer complete
Status:	Directory listing successful
The above text represents all the commands and responses of the server connection, as you can see in the section below the Quickconnect information bar . In the Remote site section, from the below picture, you can see the structure of my florinsteaua site:
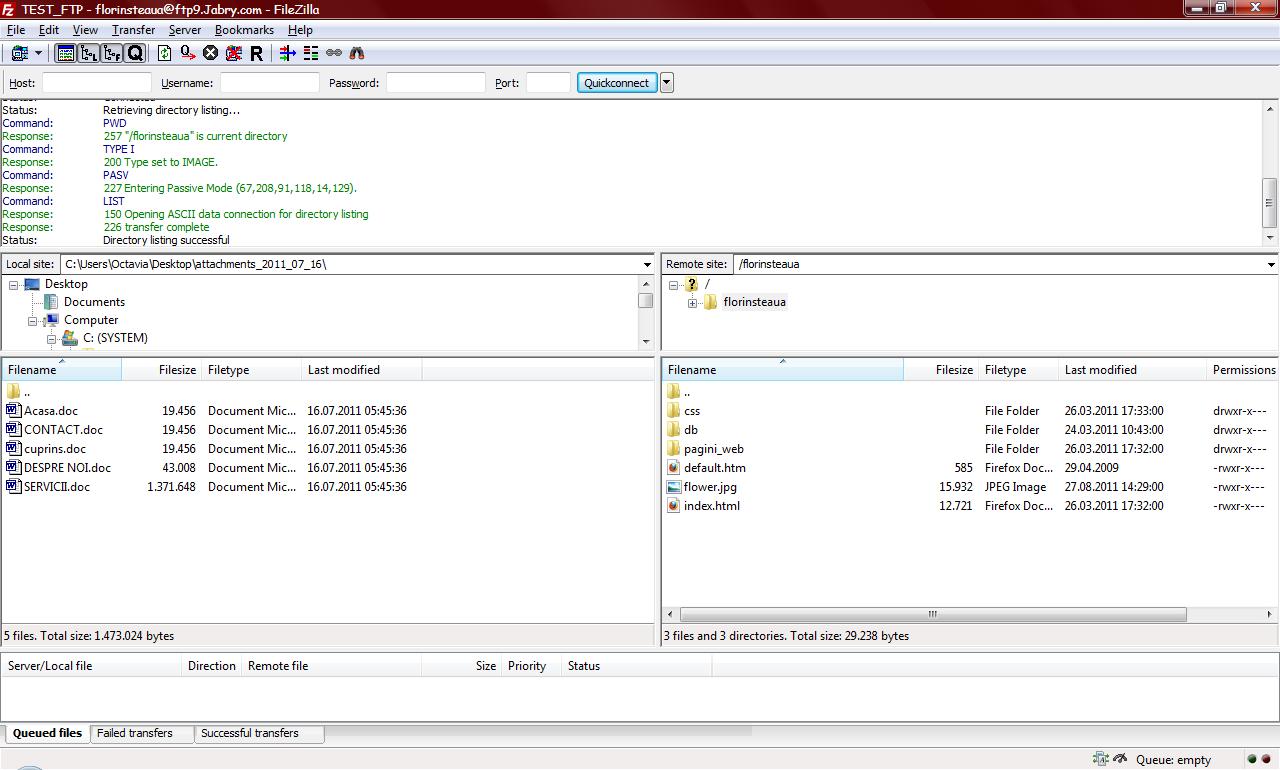
Click here for larger image
Figure 2. Using the FileZilla client to see the main folder of the site
So, let’s get back to work! Now, using the cURL, libcurl PHP library, we will create a client that will upload a picture into the main folder of our site. To do that, we will use a small HTML form:
The ftp.html listing:
<html>
<body>
<form action="ftp.php" method="post" enctype="multipart/form-data">
<div>
<label for="upload">Select file</label>
<input name="upload" type="file" />
<input type="submit" name="Submit" value="Upload" />
</div>
</form>
</body>
</html>
The form seen in browser looks like this:

Click here for larger image
Figure 3. The HTML form used to browse the file that will be uploading
The ftp.php listing:
<?php

if (isset($_POST['Submit'])) {
 if (!empty($_FILES['upload']['name'])) {
            //Initialize a cURL session
 	$ch = curl_init();
 	$localpicture = $_FILES['upload']['tmp_name'];
 	$fp = fopen($localpicture, 'r');

           //Set the URL for cURL to work with
	curl_setopt($ch, CURLOPT_URL, 'ftp://florinsteaua:[email protected]/'.$_FILES['upload']['name']);
           // Sets the TRUE option to prepare for an upload
 	curl_setopt($ch, CURLOPT_UPLOAD, TRUE);
           //Sets the input file for the transfer
 	curl_setopt($ch, CURLOPT_INFILE, $fp);
          //Sets the size of the file to be sent, in bytes
 	curl_setopt($ch, CURLOPT_INFILESIZE, filesize($localpicture));
           //Executing the upload
 	curl_exec ($ch);
 	$error_no = curl_errno($ch);
 	curl_close ($ch);
    if ($error_no == 0) {
        $error = 'File uploaded succesfully.';
        } else {
        	$error = 'File upload error.';
        }
 } else {
    	$error = 'Please select a file.';
 }
echo $error;
}
?>
In the browser, if the
$error_no=0 then everything worked fine ( you can find all the error corresponding to their number of the error here and you should get the message : ‘File uploaded successfully.’, like in the next figure:

Click here for larger image
Figure 4. The FTP OK message listed into the browser
And, now, let’s check if our picture_to_upload.jpg was uploaded.
Note that you should first try to relogin, otherwise, you will think that didn’t work, even the message was the expected one.
Note that you should first try to relogin, otherwise, you will think that didn’t work, even the message was the expected one.
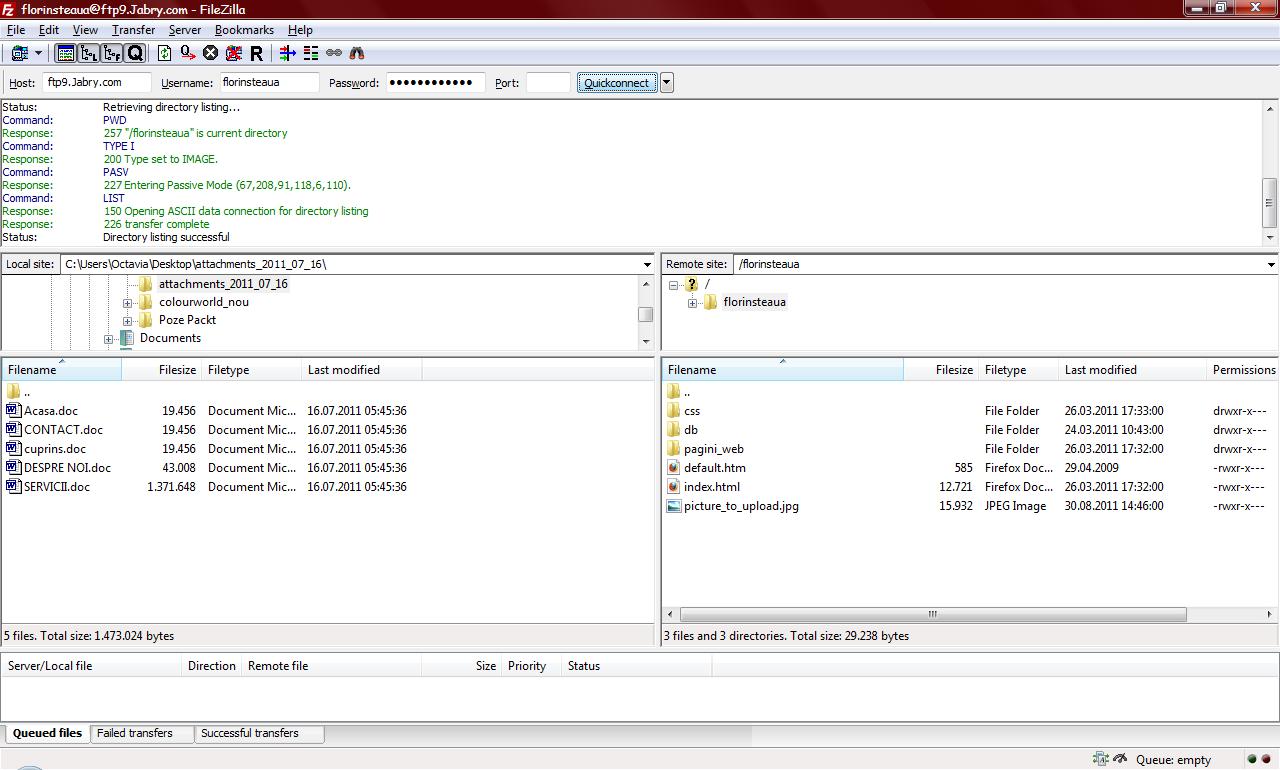
Click here for larger image
Figure5. The site structure and content after uploading the picture_to_upload.jpg picture


