Last week we discussed the new Zend Framework extension and gave you a look inside its functionality. This week we take off where we ended last week, and delve into remote objects and Zend_Amf!
First, get Zend_Amf up and running by downloading Zend Framework version 1.7 or later from the Zend Framework website. When you land on the Zend Framework download page, scroll to the bottom: You should see a table listing the currently available versions. As of this writing, Zend Framework version 1.7 is only available as a preview release. Extract the downloaded archive to a convenient location, like C:ZF on Windows. Make a note of this location, because you’ll copy files from that location in a moment.
Next, set up your web server’s directory structure for Zend_Amf. In your server’s web root folder, create a new directory called include. Beneath include, create another directory called services. The services directory houses the classes that Zend_Amf uses. The services folder and structure for a default WampServer installation are shown in Figure 4.
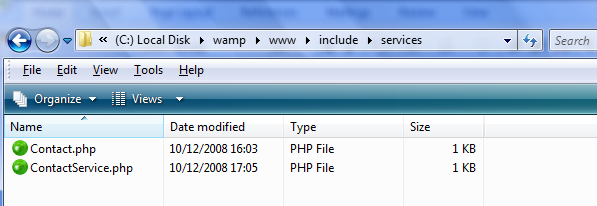
Figure 4. The services directory structure for a default WampServer installation
Notice two files in the services folder: Contact.php and ContactService.php. Create those files now, and leave them empty for the moment: You’ll add the code in a few minutes. Next, navigate to the directory above the web root of your web server-that is, the directory that contains the www, htdocs, or public_html folder. If you’re using WampServer on Windows, the path to this folder is C:wamp. From the folder to which you extracted the Zend Framework (C:ZF in this example), copy the library folder and paste it here. You should now have the Zend Framework components under the library/Zend folder. The correct folder structure is shown in Figure 5.
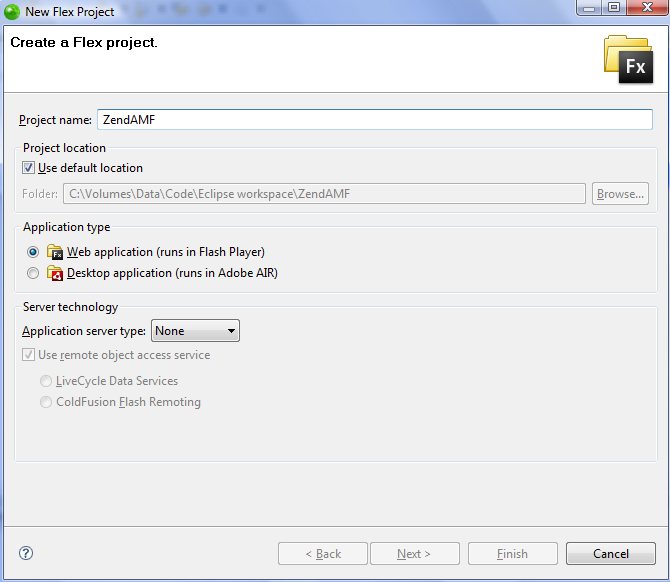
Figure 5. The library/Zend folder structure
Now that your directory structure is in place, create a gateway file that will serve as an endpoint for Flex client connections. In your web root directory, create a new PHP file called index.php, then open it in your PHP editor. This file will instantiate a Zend_Amf server and expose your methods to the Flex clients. Paste the code shown in Listing 4 into the index.php file.
Listing 4. The PHP code to create a Zend_Amf endpoint
<?php
if(set_include_path('c:wamplibrary') === false){
 die('Include path failed');
}
require_once 'Zend/Amf/Server.php';
require_once 'include/services/ContactService.php';
// Instantiate server
$server = new Zend_Amf_Server();
$server->setClass('ContactService');
$server->setClassMap('ContactVO','Contact');
$server->setProduction(false);
// Handle request
$response = $server->handle();
echo $response;
?>
The first statement, an if test, sets the include path to the Zend Framework installation. If the include cannot be completed, the script fails. Next, the Zend_Amf server is brought in along with your service class file. The server is instantiated, and the setClass method is used to specify a remote service-in this case, ContactService. The $server->setClassMap() line is very important when using custom classes: This property is used to map classes between ActionScript and PHP. When this value is properly set, you can dictate the type of objects you send and receive in your Flex application. The fist value, ContactVO, is the name of the ActionScript class; the second value, Contact, is the name of the corresponding PHP class.
The next line, $server->setProduction(false), should be used with caution. Setting this property to False increases the verbosity of the output from Zend_Amf; this is helpful for debugging but can be dangerous in production, so be sure to switch it to True in a production environment. The $response variable holds the output of the Zend_Amf server as it handles requests from clients. Finally, the response is echoed back to the client. You now need to set up the classes for use with Zend_Amf. From the webRoot/include/services directory, open the ContactService.php file you created a moment ago. Paste the code shown in Listing 5 into the empty file.
Listing 5. The PHP remote methods are defined within the ContactService class
<?php
include 'Contact.php';
class ContactService {
	/**
* get contacts
*
* @return array
**/

	function getContacts() {
		$dbh = mysql_connect('localhost', 'root');
		$listAll = 'SELECT * FROM contacts.contacts';
		$result = mysql_query($listAll, $dbh);
		$contactsArray = array();
		while ($row = mysql_fetch_array($result)) {
			$contact = new Contact();
			$contact->name = $row['name'];
			$contact->email = $row['email'];
			$contact->phone = $row['phone'];
			array_push($contactsArray, $contact);
		}
		return $contactsArray;
  	}
/**
* save
*
* @param  Contact $contact
* @return null
**/
  	function saveContact(Contact $contact) {
  		$name = $contact->name;
  		$email = $contact->email;
  		$phone = $contact->phone;
  		$dbh = mysql_connect('localhost', 'root');
  		$insert = "INSERT INTO contacts.contacts (id, name, email, phone) VALUES (NULL, '$name', '$email', '$phone')";
		$doInsert = mysql_query($insert, $dbh);
  	}
}
?>
Similar to the XMLService.php file you created in part 2, the getContacts() method of this PHP script queries the database for all the contacts in the contacts table. However, instead of assembling an XML string, the getContacts() function loops through the result, building new Contact objects from each returned row. Then, each new contact is pushed into an array. The array of contact objects is returned to the client. The saveContact() method will accept a new Contact object from the Flex client and insert it into the database. Note Again, make sure the credentials in the mysql_connect() function match your MySQL login credentials.
To create objects of the type Contact, you must define the contact object. To do so, open the Conatct.php file from the webRoot/include/services directory. Paste the code shown in Listing 6 into the empty file.
Listing 6. The Contact object defined in PHP
<?php
class Contact {
	public $id = 0;
	public $name = "";
	public $email = "";
	public $phone = "";
}
?>
The properties of the Contact class are simple and probably familiar. Each contact has an integer for an ID and a few string properties. Save your files, and pull up your web browser. Navigate to the root address of your web server-in most cases, http://localhost. If the PHP files and directories are configured properly, you will either see text similar to “Zend_Amf Server” or be prompted to download a file of type application/x-amf. Figure 6 shows this behavior in Mozilla Firefox.
Figure 6. The server sends an AMF message when the gateway file is requested
Now that your Zend_Amf gateway and server are up and running, you’re ready to create a Flex client to take advantage of them.
Creating the Zend_Amf Flex client
Note You can skip this section by importing the Flex Project archive provided in the zip archive. The Zend_Amf Flex Client source archive resides in attachedArchive/ProjectArchives/ZendAMF.zip.
Extract the XMLandPHP project archive to a convenient directory. In Flex Builder, click File > Import > Flex Project. In the dialog box that appears, choose the ZendAMF.zip archive, and then click Finish. The ZendAMF project will be added to your Flex Builder workspace.
Now that you have set up the necessary PHP code, create the Flex client to make requests and display the output. Go back to the main MXML file of the XMLandPHP project you created in the last section.
To switch the application from using HTTPService to RemoteObject, you must make a few code modifications. First, change creationComplete=”xmlService.send()” in line 1 to read creationComplete=”roContactService.getContacts()”. This change makes the application call the RemoteObject you’re about to create rather the HTTPService you used in the last section.


