For Adobe Flex and PHP developers, there is exciting news: Adobe and Zend are ramping up collaboration between their platforms. Zend Framework version 1.7 will include a new extension, Zend_Amf, to enable communication between Flex and PHP using Adobe’s Action Message Format (AMF). AMF is a binary format for Adobe Flash-based remoting, natively supported by Flash, Flex, and Adobe AIR. AMF is much more efficient than other methods of data exchange, boasting a footprint as small as 1/6 the size of plain-text formats like XML. With the Zend_Amf extension, developers can add seamless AMF support to their PHP code. Developers will also be able to use their custom Adobe ActionScript classes in PHP thanks to excellent class mapping support in Zend_Amf.
To introduce this new Zend Framework extension and give you a look inside its functionality, I show you how to build a Flex application that pulls data from a MySQL database using PHP. First, you set up the application to use XML, the conventional cross-platform data-exchange method. Then, you change the code to use AMF and custom classes. You’ll see that not only is the application’s performance improved, but your workflow as a developer is smoother, faster, and much less complicated. The result is a lot less code, and the code that remains is more modular and object oriented.
Before you get started
This article describes implementations of PHP code and Flex applications. These implementations were tested using WampServer and Windows Vista. On any system, the requirements for these examples are:
- A web server with PHP support.
- PHP version 4 or 5.
- Zend Framework version 1.7 or later.
- Zend Studio for Eclipse version 6.1.0 or later.
- Adobe Flex Builder plug-in for Eclipse version 3.0.1 or later.
- MySQL version 4 or 5.
The code for both PHP and Flex will be created in Zend Studio for Eclipse version 6.1, with the Flex Builder integrated development environment (IDE) provided by the Flex Builder Eclipse plug-in version 3.0.1. For a complete step-by-step guide to setting up these two products together in a single IDE, read my article, “Learn Flex and PHP,” on Adobe’s Developer Center.
Note: These examples are for demonstration purposes only. You should secure them and test them thoroughly before using them on a production machine.
Setting up the database
Before you start building your first Zend_Amf application, you need to create a database for the sample data. The Structured Query Language (SQL) script to import the sample data
Part 1: The conventional approach-XML with HTTPService
XML has become the standard for exchanging data between disparate systems. Virtually all programming languages used on the web have the ability to create and parse XML. Because of this extensive usage, it’s important that you become familiar with Flex’s powerful XML feature set.
To begin, create a new PHP file in the web root folder of your web server. If you’re using a default WampServer installation, this directory is C:wampwww. Name the file XMLService.php, and open it in your PHP editor.
The first code you place in the file will handle any data sent to the file from Flex through a POST command. This will allow your Flex application to send new contacts to the database through PHP. Type the following code in your XMLService.php file:
&ls;?php
$name = $_POST['name'];
$email = $_POST['email'];
$phone = $_POST['phone'];
Next, create a connection to the MySQL server for inserting and retrieving records. The following code will establish this connection in a default WampServer installation with a MySQL user name of root and no password:
$dbh = mysql_connect('localhost', 'root');
If your MySQL root user has a password, append it after root:
$dbh = mysql_connect('localhost', 'root', 'password');
Next, add a SELECT statement to get all the records in the contacts table. Also, add the code to start building a string of XML:
$listAll = 'SELECT * FROM contacts.contacts';
$result = mysql_query($listAll, $dbh);
$xml = '<?xml version="1.0"?>';
$xml .= '<contacts>';
The above code gets all the contacts and prepares your XML file for the repeating elements-in this case, the individual contacts. To create each of the repeating XML elements, loop through the result set of contacts that MySQL returns, adding XML tags as necessary for the contact’s name, e-mail address, and phone number:
while ($row = mysql_fetch_object($result)) {
	$xml .= '<contact>';
	$xml .= '<name>' . $row->name . '</name>';
	$xml .= '<email>' . $row->email . '</email>';
	$xml .= '<phone>' . $row->phone . '</phone>';
	$xml .= '</contact>';
Finally, you must add the closing tag for the parent element, , output the XML string, and close out the <?php> tag:
$xml .= '</contacts>';
echo $xml;
?>
The complete XMLService.php file is available for download in the attached .zip file, under the webRoot folder.
Creating the Flex client for XML
Now that you have set up the necessary PHP code, you need to create the Flex client to make requests and display the output. Begin in your Flex IDE by clicking File > New > Flex Project. Name the project XMLandPHP. Select Web Application as the Application Type, and then click Finish. The appropriate options are shown in Figure 1.
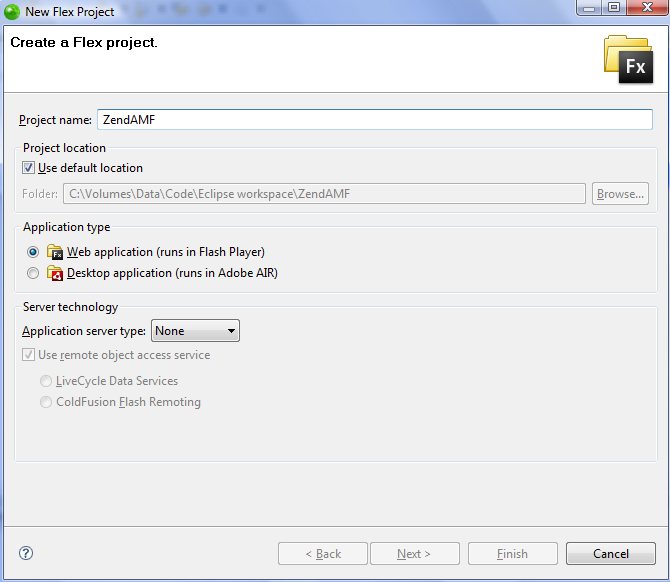
Figure 1. The New Flex Project dialog box in Flex Builder
Flex Builder takes a moment to create the new project, and then opens the XMLandPHP.mxml file in the editor pane. If the file opens in Design mode, switch to the Source view by clicking Source, as shown in Figure 2.


