As you can see, there is no reason
for a
associated variables and maps to a corresponding Adobe
ActionScript class. The values are pulled directly from the
Object using the
for a
User.php class that wraps all theassociated variables and maps to a corresponding Adobe
ActionScript class. The values are pulled directly from the
$user variable that is sent over as a genericObject using the
$user->value syntax.
Drag-and-Drop Data Binding
Make sure you have the Application
MXML file open and the Design view selected. Next, drag a
Components window. Now select and drag the
Data/Services tab and drop it on top of the
look at the new code that was just generated for you.
MXML file open and the Design view selected. Next, drag a
VDividedBox onto the stage. Then, drag aDataGrid into it from theComponents window. Now select and drag the
getAllUsers() method from theData/Services tab and drop it on top of the
DataGrid. Switch to the Source view, and take alook at the new code that was just generated for you.
Now, run the application.
Hopefully, without having made any modifications, your
browser window displays something similar to Figure 9. Of
course, if you didn’t bother to take the time to insert data
into your database, now might be a good time to go back and
do that; then, try running the application again.
Hopefully, without having made any modifications, your
browser window displays something similar to Figure 9. Of
course, if you didn’t bother to take the time to insert data
into your database, now might be a good time to go back and
do that; then, try running the application again.

Click here for larger image
Figure 9
Generating a Master Details Form
Next, auto-generate a
Master/Details form. With the main MXML
application file open, select the Design view again. Then,
right-click on the data grid and click Generate
Details Form. In the first window
that appears, select the form options. Make sure you select
Master control from the first drop-down
list; the Make form editable check box
should already be selected. (Clear this check box if you do
not want the details of the selected item in the
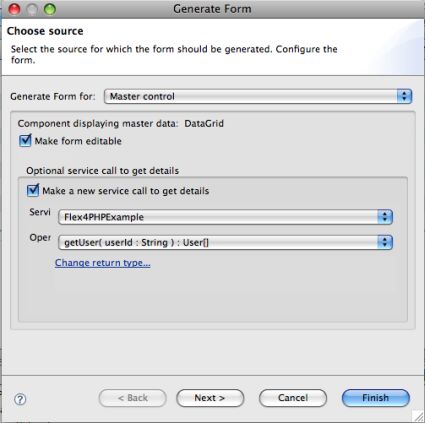
Make a new service call to get details
check box. The service you created earlier should already be
selected. In the Operation drop-down list,
select the
operation, as seen in Figure 10. When an item is selected in
the data grid, the corresponding information will be
displayed in the form that appears below it.
Master/Details form. With the main MXML
application file open, select the Design view again. Then,
right-click on the data grid and click Generate
Details Form. In the first window
that appears, select the form options. Make sure you select
Master control from the first drop-down
list; the Make form editable check box
should already be selected. (Clear this check box if you do
not want the details of the selected item in the
DataGrid to be editable.) Next, select theMake a new service call to get details
check box. The service you created earlier should already be
selected. In the Operation drop-down list,
select the
getUser(userId:String):User[]operation, as seen in Figure 10. When an item is selected in
the data grid, the corresponding information will be
displayed in the form that appears below it.
Click here for larger image
Figure 10
After clicking
Next, you will see a window that looks like
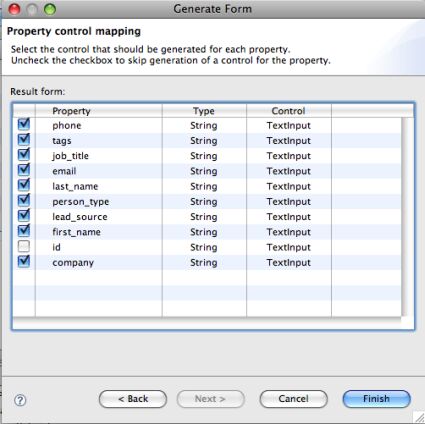
Figure 11. As you can see, the check box for the
displayed in the form. However, you also have the option of
displaying the value of a field without making it editable
by selecting Text instead of
TextInput for the corresponding
Control type. Now, click
Finish.
Next, you will see a window that looks like
Figure 11. As you can see, the check box for the
id property has been cleared so that no ID isdisplayed in the form. However, you also have the option of
displaying the value of a field without making it editable
by selecting Text instead of
TextInput for the corresponding
Control type. Now, click
Finish.
Click here for larger image
Figure 11
When you switch to Code view now,
you’ll notice that your application file is starting to be
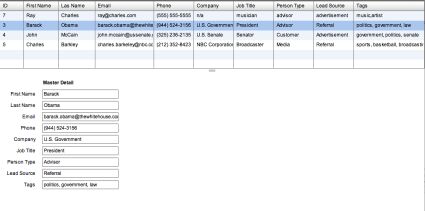
somewhat lengthy. Figure 12 demonstrates what the
application looks like when an item is selected from the
you’ll notice that your application file is starting to be
somewhat lengthy. Figure 12 demonstrates what the
application looks like when an item is selected from the
DataGrid.
Click here for larger image
Figure 12

